
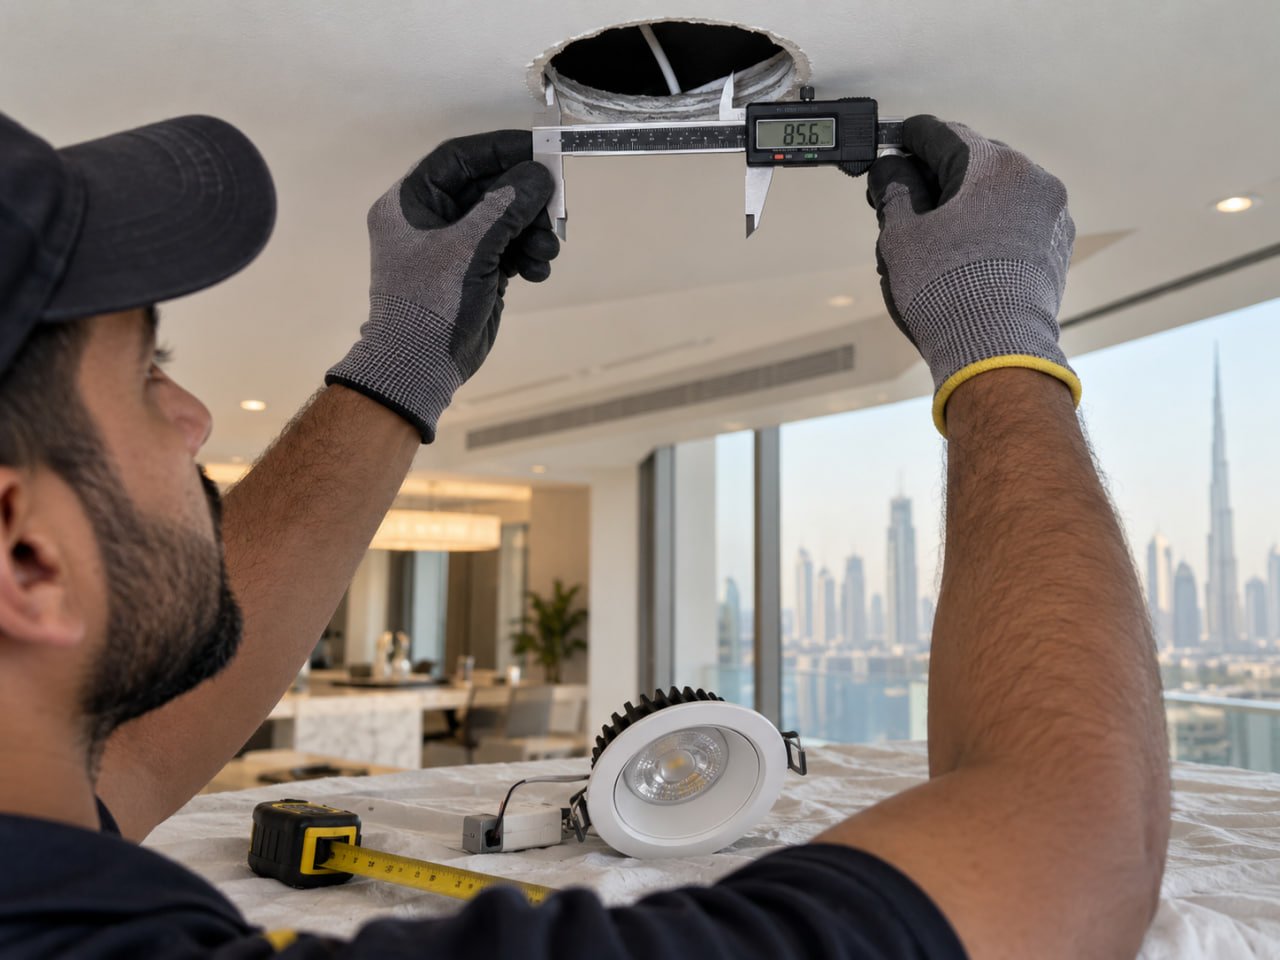
Downlight Cut-Out Size Guide: How to Measure Before Buying a Replacement
A replacement downlight can look almost identical to the old fitting and still not fit the ceiling. The first number to check is the downlight cut-out size: the diameter or dimensions of the opening that the recessed body passes through.
That is not the same as the visible face of the light. Before buying a replacement in Dubai, measure the ceiling opening itself, then confirm the trim diameter, recessed depth, mounting clips and electrical compatibility.
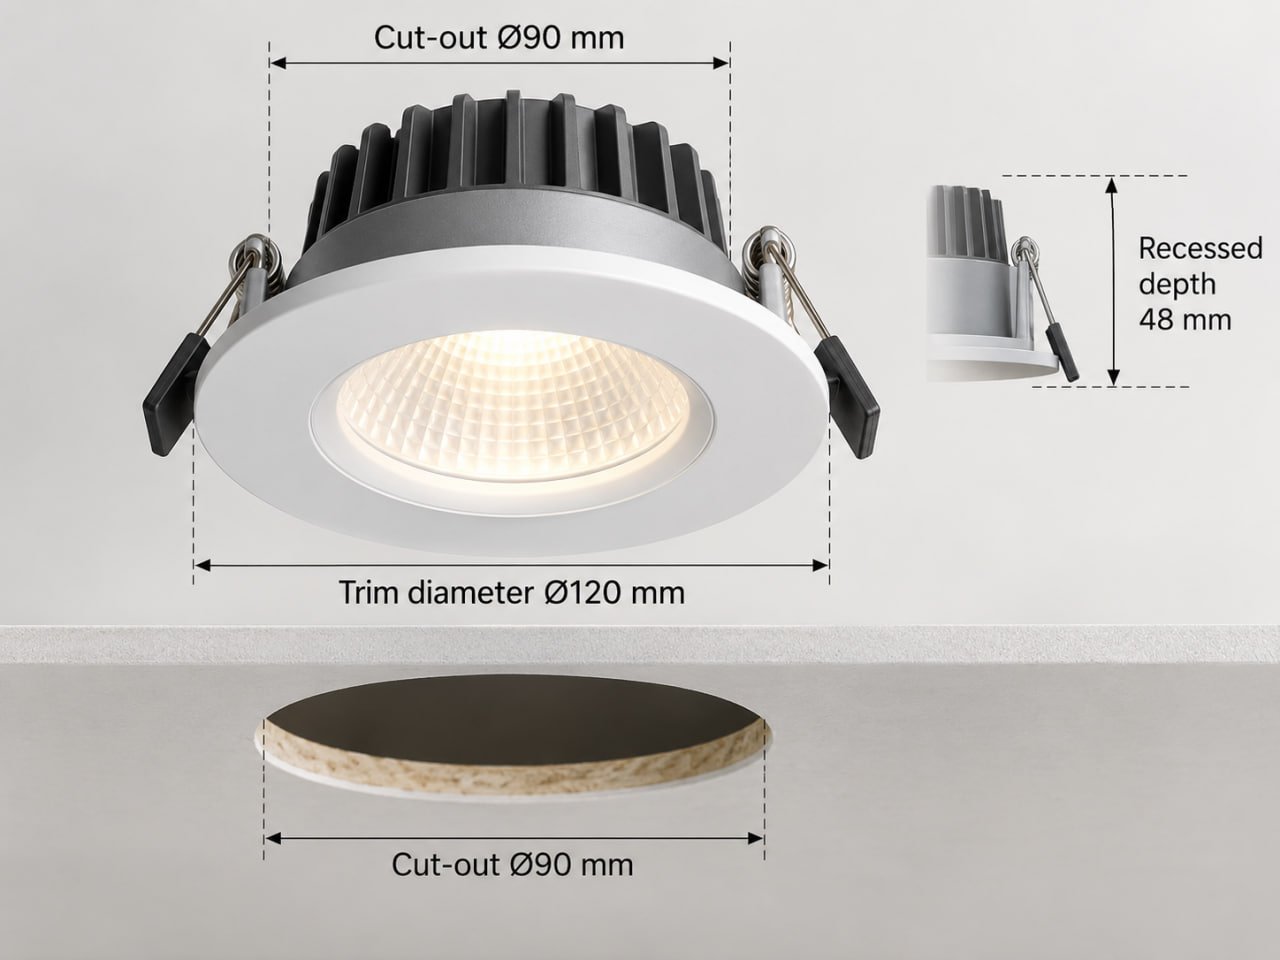
Cut-Out Size vs. Trim Diameter
For a round downlight, “cut-out Ø90 mm” refers to the ceiling opening, not the full visible diameter. The Ø symbol means diameter.
The visible part of the fitting is normally larger. It may be described as the trim, bezel, face or overall diameter. That extra width covers the edge of the ceiling hole.
This distinction matters during replacement. Measuring a 110 mm visible trim and ordering another 110 mm downlight does not tell you what opening the new fitting requires. Always find the cut-out or aperture dimension in the product specification.
Square and rectangular recessed lights follow the same principle, but their openings are normally specified as width × length.
How to Measure the Existing Downlight Cut-Out
Switch off the relevant electrical supply before removing a recessed fitting. If removal requires handling exposed wiring or you are not confident the circuit has been safely isolated, use a competent electrician.
With the old downlight removed, place a tape measure across the inside of the ceiling opening. Measure from one inside edge to the opposite inside edge.
For a round opening, take two measurements across different directions. Hand-cut gypsum openings are not always perfectly circular. An opening may measure 89 mm one way and 92 mm the other. Record both numbers rather than immediately calling it a 90 mm hole.
For square or rectangular fittings, measure both sides.
Use millimetres and take a clear photo with the tape visible. If a room contains many downlights, measure several openings before ordering the full quantity. Previous installations can leave small differences between holes that look identical from below.
Professional observation: the ceiling opening is more useful than the old bezel diameter. The bezel tells you what covered the hole; the opening tells you what the next fitting must fit.
Three More Measurements Worth Checking
Once you know the cut-out, check the trim diameter. The new trim should cover the complete opening, including minor chips or uneven edges.
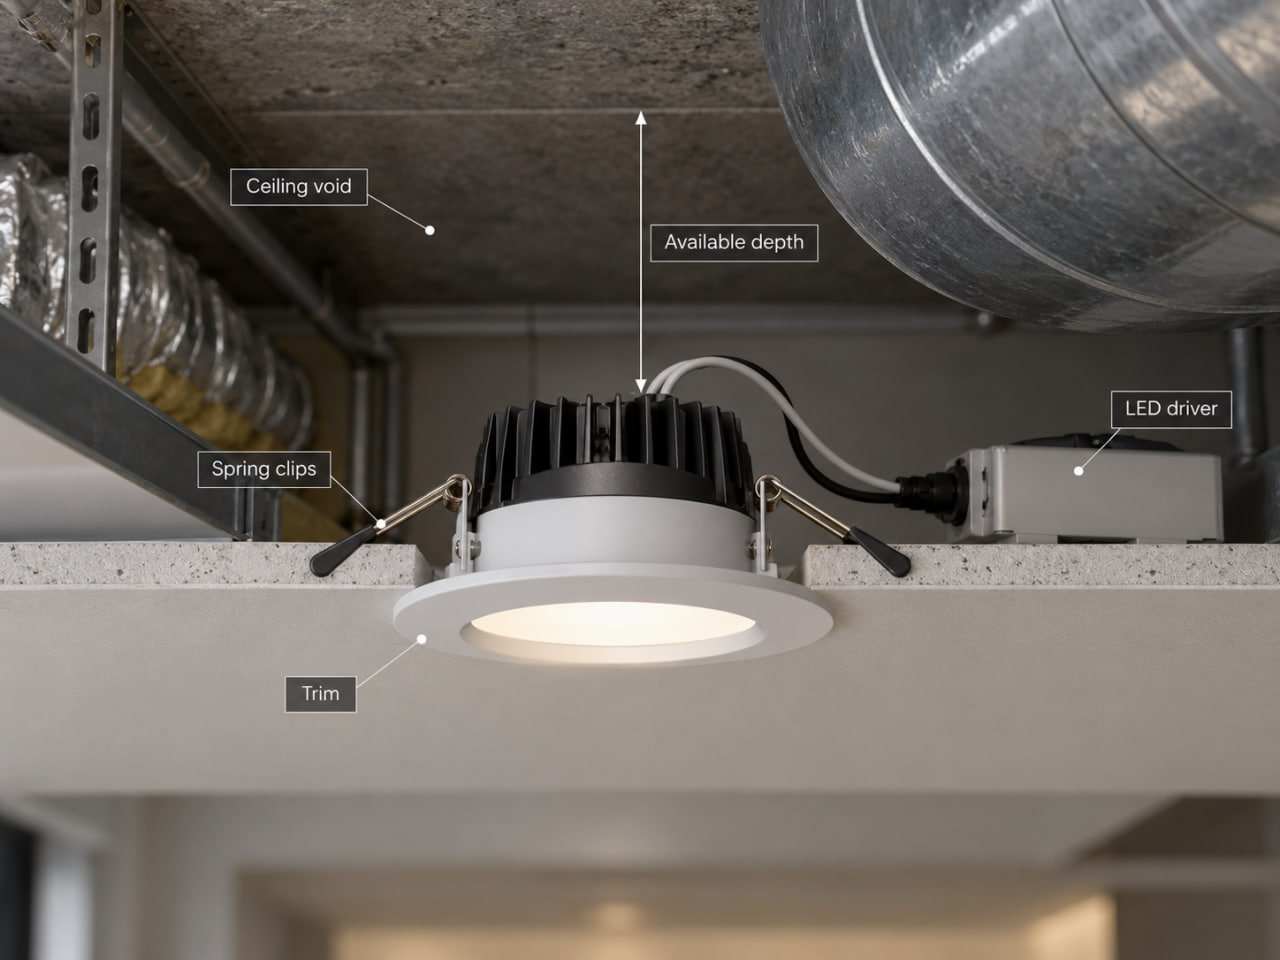
Next, check recessed depth. Space above a gypsum ceiling may be limited by ducts, pipes, framing or other services. Compare the available void with the full installed depth of the proposed fitting and any separate driver.
In refurbishment work, ceiling depth is easy to overlook because it cannot usually be judged from below. Two downlights with a similar visible size may occupy very different amounts of space above the ceiling.
Then look at the mounting system. Many recessed downlights use spring clips that open behind the ceiling board. The product’s stated cut-out range matters because those clips need suitable material to grip.
A wider trim may hide an oversized hole, but it does not necessarily make the fitting secure.
What If the New Downlight Does Not Match the Hole?
A slightly smaller existing opening may be enlarged, but only after confirming the final product dimensions and checking what is behind the ceiling.
An oversized opening needs a different approach. Depending on the ceiling and fitting, the practical options may include a product designed for a wider cut-out range, a suitable adapter or converter plate, or repair of the opening.
For an irregular or damaged hole, measure the narrowest and widest points. Both dimensions matter when checking whether the fitting will pass through, grip correctly and cover the cut edge.
For projects with many existing downlights, checking several openings before placing the order is usually more useful than assuming the original installer cut every hole to exactly the same size.
Physical Fit Is Only Part of the Replacement
Once the fitting matches the ceiling, confirm how it is powered. Some LED downlights use a separate driver; others use integrated control gear. A connector that happens to fit does not prove that an existing driver is compatible.
Check the required voltage, driver specification and dimming compatibility for the exact product.
For the lighting itself, compare lumen output, colour temperature and beam distribution. Wattage alone is not a reliable like-for-like specification. Two downlights with the same wattage and cut-out can produce noticeably different light.
If the purpose of the lighting has changed — for example, from general illumination to highlighting artwork, shelving or merchandise — a directional fitting may be more suitable than another fixed downlight. The spotlight collection includes options intended for accent-lighting applications.
A Practical Note for Replacement Work in Dubai
For a straightforward replacement in Dubai, the main purchasing decision remains product compatibility: cut-out, trim, depth, mounting and electrical specification.
There is no reason to turn a simple downlight measurement into a regulatory exercise.
However, if the work involves changes to wiring or the electrical installation rather than replacing the fitting itself, use a competent electrical professional and check the requirements applicable to that scope in Dubai. DEWA’s electrical installation regulations cover electrical installations and alterations within the Emirate.
What to Record Before Contacting a Supplier
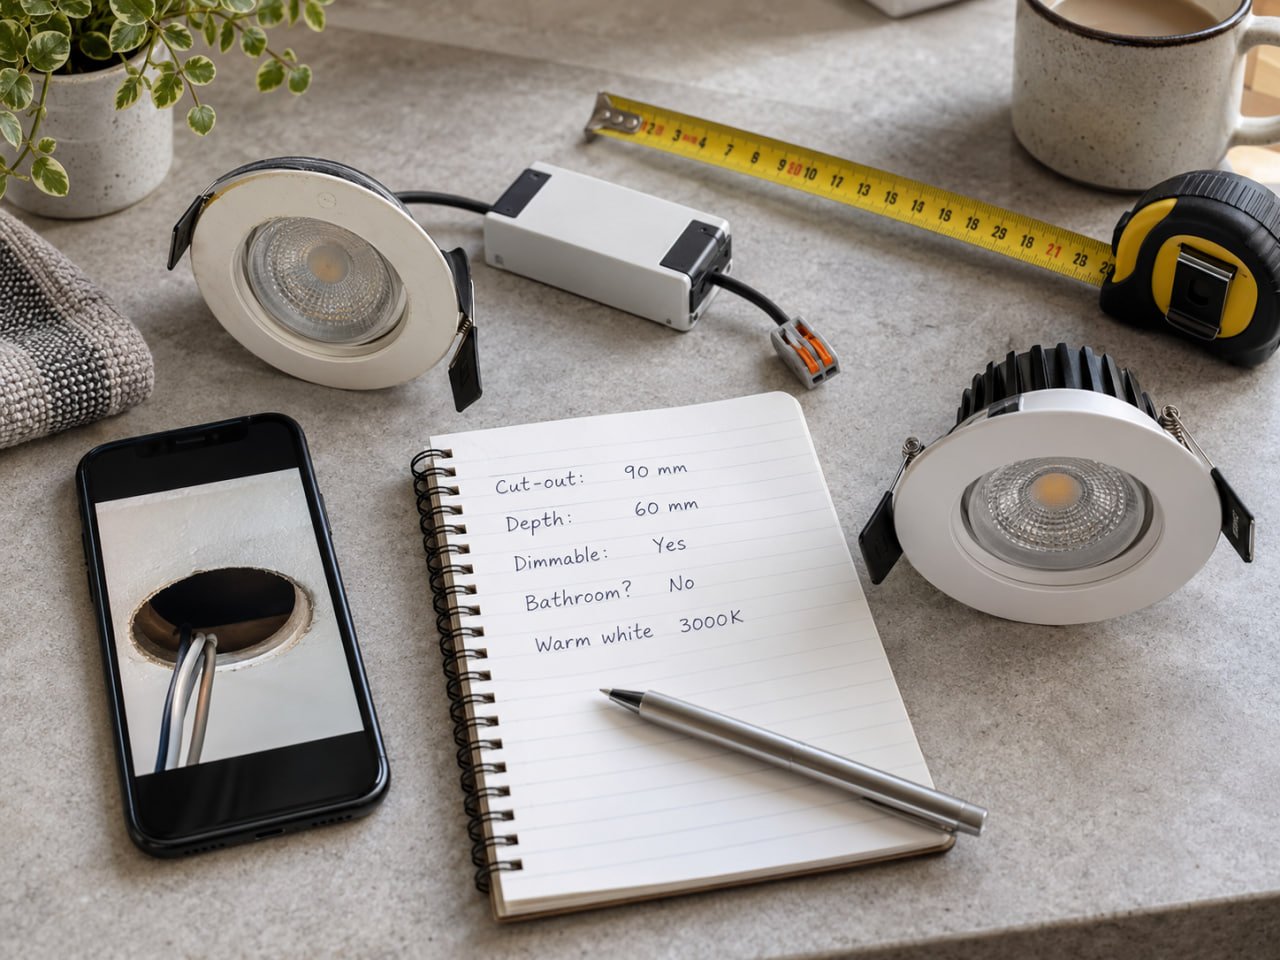
Before asking for a replacement, record:
- ceiling cut-out in millimetres;
- available recessed depth;
- trim diameter needed to cover the existing opening;
- photos of the old fitting and driver label, where accessible;
- colour temperature and dimming requirement, if known;
- whether the fitting is in a bathroom, exterior area or another location requiring a specific product rating.
That information is much more useful than asking for another “10 W downlight.” Wattage does not tell a supplier what ceiling opening the fitting needs.
For larger residential or commercial replacements, ORIX lighting services can assist with product selection and technical coordination where a simple like-for-like purchase is not enough.
Measure First, Buy Second
The fastest reliable process is to measure the ceiling opening first and shop from that dimension.
Confirm the cut-out range, then check that the trim covers the opening, the body fits the available depth and the mounting clips can secure correctly. After that, verify the driver and lighting specification.
That is usually enough to avoid the most common replacement mistake: buying a downlight that looks right from below but does not fit the existing ceiling.
source for checking : Regulations for Electrical Installations DEWA (Dubai Electricity and Water Authority)